

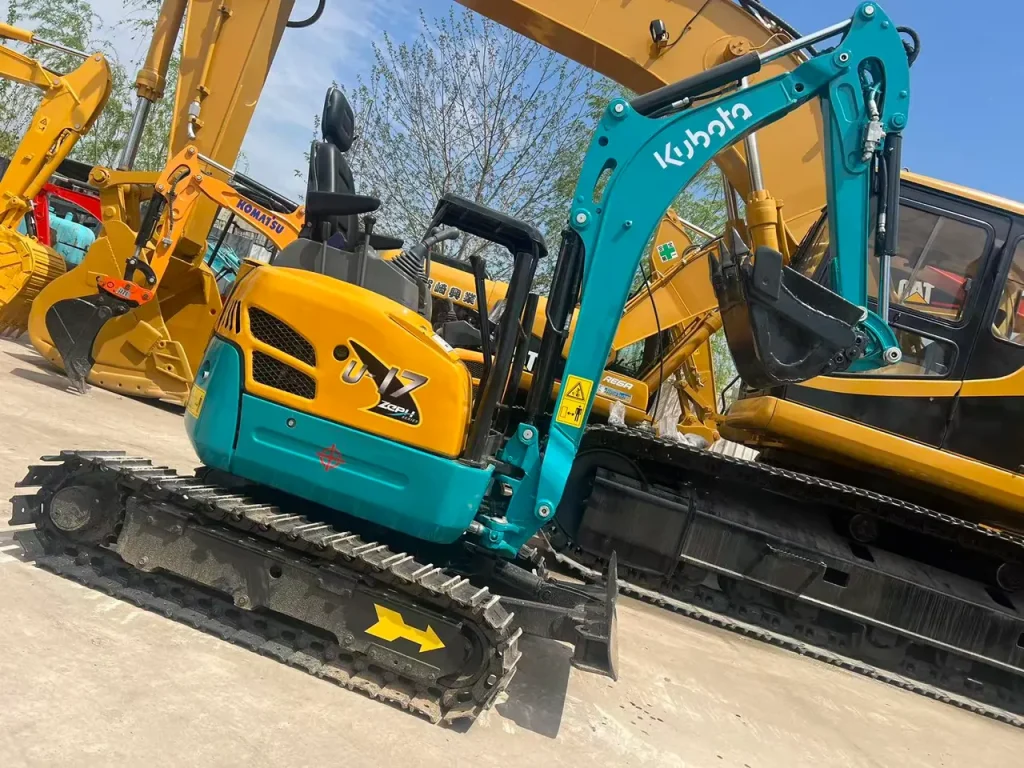
A used Cat excavator can feel like the practical middle ground between paying new-machine prices and gambling on an unfamiliar brand. You may get proven digging power, widely available parts, dealer support, and many productive years ahead. But there is a catch: two machines with the same model year and hour reading can have completely different futures.
One may have spent its life loading loose soil with careful operators and regular servicing. The other may have hammered rock, worked in salt, missed oil changes, and received fresh paint shortly before being listed. The hour meter alone cannot reveal that difference.
Key takeaway: You are not simply buying a used Cat excavator. You are buying its previous workload, maintenance habits, hidden wear, attachments, documentation, and likely repair bill. The seven checks below help you examine all of those factors in a sensible order.
For purchase planning beyond the field inspection, compare seller history, machine fit, and ownership risk in our used Cat excavator buying guide.
This guide was reviewed for practical accuracy on August 12, 2026. Specifications, prices, warranties, emissions rules, and inspection requirements can vary by model, serial number, location, and jobsite. Confirm machine-specific details with a qualified technician, your Cat dealer, and the authorities responsible for your area.
First, define what your used Cat excavator must actually do
It is easy to fall in love with a clean cab, glossy yellow paint, or an attractive monthly payment. Start with your work instead. Write down your usual digging depth, lifting needs, working space, ground conditions, attachment requirements, transport limits, and expected hours per year.
Imagine three everyday situations. If you install residential drainage in narrow yards, a compact-radius mini excavator may save you from removing fences or damaging landscaping. If you load trucks on road projects, reach, bucket capacity, cycle speed, and stability matter more. If you clear rocky land, hydraulic flow, guarding, cooling capacity, and the machine’s history with hammers become crucial.
Do not assume that “bigger is safer.” An oversized machine may require a heavier trailer, a different tow vehicle, additional permits, more fuel, and more room to swing. An undersized excavator may force you to make extra passes or operate near its limits all day. Either mismatch can erase the apparent saving in the purchase price.
| Typical use | What you should prioritize | Useful configuration | Main mismatch risk |
|---|---|---|---|
| Backyards and utilities | Access and low disturbance | Compact size, blade, rubber tracks | Machine cannot fit through gates |
| General construction | Versatility and uptime | Medium crawler, coupler, 2 buckets | Wrong bucket or transport weight |
| Rock and demolition | Hydraulics and protection | Auxiliary lines, guards, heavy-duty undercarriage | Heat, cracks, and accelerated wear |
| Roadside or urban work | Control and limited tail swing | Reduced-radius body, camera, grade tools | Counterweight or boom enters traffic |
For live model, location, hour, and configuration comparisons, use the official Cat Used excavator marketplace. It helps you establish a current asking-price range and see which attachments are commonly included. Treat listings as comparison points, not proof that any particular machine is mechanically sound.
Check 1: Match the identity, hours, and ownership records
Before studying the paint, confirm that the machine is what the seller claims. Locate the product identification number or serial plate. Compare it with the sales document, service invoices, electronic records, and any plate or stamp on major components. A damaged, altered, freshly replaced, or unreadable identification plate deserves an explanation before money changes hands.
Ask for the model, serial number, manufacturing year, current meter hours, ownership history, lien status, maintenance records, attachment list, and reason for sale. If the seller says that a dealer serviced the excavator, request dated dealer invoices or ask whether the records can be released with the owner’s authorization.
Hour-meter fraud is not the only concern. A meter may have been legitimately replaced after a display failure. That does not automatically make the excavator bad, but the replacement and previous reading should be documented. Compare the stated hours with pedal wear, joystick looseness, seat condition, bucket-pin movement, track wear, and service history. A machine showing 2,400 hours should not normally look as though every control has endured three shifts a day for a decade.
Relatable mistake: You find a low-hour excavator at a bargain price and assume the faded pedals came from muddy boots. After buying it, an old service invoice shows more hours than the current meter. The real failure was not noticing the pedals; it was accepting one number without comparing independent evidence.
You should also confirm that the seller has authority to sell the machine and can provide clear ownership documents. Construction equipment identification does not always work like a road vehicle’s 17-character VIN, so do not rely blindly on an automotive decoder. Verify the serial number through the manufacturer or an authorized dealer and use the appropriate ownership, lien, and stolen-equipment resources for your jurisdiction.
Check 2: Inspect the undercarriage before admiring the cab
The undercarriage carries the excavator over abrasive material while supporting its weight. That makes it one of the most important areas to measure and one of the easiest places for an inexperienced buyer to underestimate future cost.
Bring a flashlight, gloves, straightedge, tape measure, camera, notebook, and the correct model’s wear limits. Look at track shoes, links, pins, bushings, rollers, idlers, sprockets, guards, adjusters, and final-drive areas. Check both sides because wear can be uneven.
Sharp or hooked sprocket teeth, leaking rollers, bent shoes, loose hardware, damaged guards, and a track adjusted unusually tight are warning signs. Excessively tight tracks increase load on components; loose tracks can derail. Packed mud may hide leaks or damage, so ask for a reasonably clean machine without demanding that the seller pressure-wash away every clue immediately before your visit.
Do not estimate remaining life from appearance alone. Measure components using the manufacturer’s procedure and compare the results with the model-specific service limits. Think of it like checking tire tread: “it still has some metal” tells you very little. Location, operating technique, terrain, track tension, and shoe width all influence wear.
Formula 1 — estimated undercarriage budget:
Expected near-term cost = quoted replacement cost × estimated wear used
If a qualified inspection indicates that approximately 75% of the usable undercarriage life has been consumed and a relevant replacement quote is $24,000, your simple planning allowance is $24,000 × 0.75 = $18,000. This is a negotiating estimate, not a prediction that every component will fail together. Use current local parts-and-labor quotations rather than a generic internet price.
Check 3: Look for structural damage, leaks, and disguised repairs
Walk around the cold machine slowly. Inspect the boom, stick, frame, counterweight, carbody, bucket, coupler, blade if fitted, and every accessible pin area. Search for cracks, fresh welds, rippled steel, missing fasteners, impact marks, and paint that differs in shade or texture.
A repair is not automatically disqualifying. A properly engineered and documented repair can be serviceable. The danger is an unexplained weld in a highly stressed area, especially when fresh paint or heavy grease hides its edges. Ask who completed the work, why it was needed, which procedure was followed, and whether supporting invoices exist.
Check hydraulic cylinders for damaged rods, pitting, scoring, and wet seals. Examine hoses at bends and rubbing points. A light film of dust stuck to old residue differs from a fresh leak that forms a drop during the test. Inspect the swing bearing area, pump compartment, valve area, engine, final drives, and the ground beneath the parked machine.
Then test movement at the bucket, stick, boom base, coupler, and swing bearing. A technician can use controlled movements and measurement tools to distinguish normal clearance from costly wear. Never stand beneath raised equipment or place your hands between moving joints.
Relatable mistake: A buyer sees new bucket pins and assumes the front linkage has been rebuilt. Two weeks later, the bucket rocks during grading because the worn bores and bushings were never corrected. New pins can reduce visible movement temporarily, but they do not restore an enlarged bore.
Check 4: Demand a true cold start and a full operating test
Ask the seller in advance not to start or warm the used Cat excavator before you arrive. When you reach the site, touch only a safe external area or use an appropriate temperature tool to confirm that the engine is genuinely cold. A warm engine can hide difficult starting, smoke, weak batteries, injector trouble, or slow hydraulic response.
Before starting, check fluid levels and condition according to the operator’s manual. Do not open a hot pressurized cooling system. Turn the key on, observe whether warning lamps illuminate during their self-test, and note any messages. A warning lamp that never appears may be disconnected rather than reassuring.
Watch the exhaust during startup and warm-up. A brief change may have several explanations, but persistent abnormal smoke, rough running, knocking, excessive blow-by, warning codes, or strong fuel and coolant odors require diagnosis. Do not guess the repair from smoke color alone.
Once the machine reaches normal operating condition, test travel in both directions and speeds, steering response, swing, boom, stick, bucket, blade, auxiliary hydraulics, coupler, lights, horn, camera, wipers, climate control, and safety devices. Operate it under a realistic load with permission. A smooth no-load demonstration in a parking area cannot show how the hydraulic system behaves when digging compacted ground.
| Stage | Approximate time | What you do | Success indicator |
|---|---|---|---|
| Cold inspection | 20–30 min | Check identity, fluids, leaks, structure, and warning-lamp test | No unexplained mismatch or active leak |
| Warm-up test | 10–20 min | Listen, watch exhaust, cycle functions gently | Stable operation without active alerts |
| Loaded test | 15–40 min | Dig, lift safely, travel, swing, and test attachments | Predictable power and control when hot |
Use the proper operator’s and maintenance manuals for the exact serial-number range. Caterpillar’s parts and service manual resource explains where you can obtain machine-specific documentation instead of applying a checklist written for a different excavator.
Check 5: Turn fluids, codes, and records into evidence
A laboratory fluid analysis can reveal contamination, abnormal wear material, coolant condition, or fluid degradation that your eyes cannot see. It works like a blood test: it does not prove that the whole machine is healthy, but it can reveal patterns that justify closer investigation.
Sampling quality matters. A sample taken from a dirty drain pan or immediately after fresh oil was installed may mislead you. Ask who took each sample, when it was taken, how many hours were on the fluid, whether the oil was recently changed, and whether earlier trend reports exist. One sample is useful; a consistent series is more informative.
Caterpillar explains that fluid analysis can help identify developing problems, schedule repairs, and build service history. Its official S·O·S fluid-analysis page shows how to contact a dealer and interpret sampling as part of equipment-health management. The source is useful for the process, but any savings example from a company case should not be treated as a guaranteed result for your excavator.
Have a qualified technician retrieve active, logged, and historical diagnostic codes with a compatible service tool. A cleared dashboard does not prove that no problem occurred. Compare timestamps and machine hours where available. Ask why codes appeared and what repairs followed.
Telematics can add location, utilization, fault, and service information, but availability depends on the machine, hardware, subscription, and owner permissions. Make the transfer of any connected account or device part of the written deal. Do not assume that a screen visible during the demonstration will remain accessible after purchase.
Relatable mistake: A seller says, “The oil was changed yesterday as a favor.” Fresh oil sounds positive, but it also removes the chance to inspect the previous oil and can weaken the value of an immediate sample. Ask for the service receipt, previous analysis, filter inspection, and a clear explanation of why the change occurred just before sale.
Check 6: Verify emissions equipment, safety duties, and attachment compatibility
Used does not mean exempt from every current rule. The engine’s certified configuration, your location, project contract, funding source, operating environment, and local air-quality program can affect whether a particular excavator is suitable. Before buying, confirm the engine label, emissions tier, aftertreatment condition, and whether emissions components have been removed, altered, or defeated.
The U.S. Environmental Protection Agency’s nonroad diesel equipment regulations page, updated March 11, 2026, explains that excavators fall within nonroad compression-ignition equipment rules. It also links to the current federal regulations. The EPA notes that Tier 4 systems combine engine and fuel controls and that ultra-low-sulfur diesel has a maximum sulfur concentration of 15 parts per million. Use this page to understand the federal framework, then check state, regional, and project-specific requirements.
Attachments need the same care. Confirm pin dimensions, coupler type, machine weight limits, required hydraulic flow and pressure, return-line arrangement, electrical controls, guarding, and the attachment’s operating instructions. “It connects” does not mean “it is approved or safe.” An oversized hammer or incompatible coupler can create instability, heat, wear, and serious safety hazards.
Also separate machine inspection from safe excavation practice. A mechanically excellent excavator does not make an unsafe trench safe. OSHA states that trenches 5 feet or deeper generally require a protective system unless they are entirely in stable rock; trenches 20 feet or deeper require a system designed or approved as specified by a registered professional engineer. OSHA also says spoil and materials should be kept at least 2 feet from the edge and calls for competent-person inspections before entry and as conditions change. Read the OSHA trenching and excavation fact sheet for these baseline protections, then follow the complete rules and any stricter local requirements.
Finally, make sure the cab and safety equipment fit your operation. Inspect the seat belt, access steps, handholds, mirrors, cameras, alarms, guards, windows, emergency exit, horn, and labels. Confirm the installed protective structure is appropriate and has not been drilled, cut, badly corroded, or improperly repaired.
Check 7: Calculate the real first-year cost before negotiating
The asking price is only the front door. Your actual first-year cash requirement may also include tax, finance charges, inspection, transport, permits, initial service, immediate repairs, undercarriage work, missing attachments, insurance, registration where applicable, telematics, storage, and downtime coverage.
Formula 2 — practical first-year cost:
First-year cost = purchase price + delivery + taxes and fees + immediate work + finance cost + expected downtime − included value
Suppose a used Cat excavator costs $92,000. Delivery is $2,000, taxes and fees are $6,900, immediate service and repairs are $8,500, and estimated first-year finance cost is $4,600. You expect 16 hours of downtime at an estimated business impact of $180 per hour, or $2,880. Included buckets have a verified value to you of $4,000.
Your comparison cost is $92,000 + $2,000 + $6,900 + $8,500 + $4,600 + $2,880 − $4,000 = $112,880. Another excavator listed at $101,000 may be the better buy if it needs little immediate work and includes the correct coupler and buckets.
Caterpillar’s current downtime guidance offers a simple baseline: multiply hourly ownership expense by hours down, then add collateral costs such as idle labor, associated equipment, and replacement rental. The Cat equipment downtime guide explains daily inspections, preventive maintenance, data tracking, fluid analysis, operator training, and contingency planning. Its example of $25 per hour for 10 hours equals $250, but your own labor and production losses may be much larger.
| Method | Your time | Upfront cost | Risk reduction |
|---|---|---|---|
| Listing review only | 1–2 hr | $0 | Low; useful only for screening |
| Your walkaround and test | 2–4 hr | Travel and supplies | Moderate if you know the model |
| Independent technician inspection | 3–6 hr | Get a local written quote | Higher; includes measured evidence |
| Inspection plus fluid analysis | Several days | Get lab and technician quotes | Highest of these options, not a guarantee |
How to negotiate without turning the inspection into an argument
Separate facts from predictions. “The left final drive is wet and the technician quoted $6,400 for the documented repair” is useful. “This machine is probably going to fall apart” is not. Give the seller a short list containing photographs, measurements, code reports, laboratory findings, and written estimates.
Classify each finding into one of three groups: a safety or legal blocker, an immediate repair, or a future maintenance allowance. Then decide whether you want a repair completed before delivery, a price adjustment, money held back under an agreed arrangement, or the freedom to walk away.
Loss aversion can work against you here. After driving several hours, paying for an inspection, and imagining the excavator on your job, you may feel that leaving wastes your effort. It does not. The inspection fee purchases information. Walking away from a poorly documented machine can be the most valuable result that information produces.
Put every important promise in the purchase agreement: exact serial number, meter reading, attachments, buckets, manuals, keys, software or telematics transfer, lien release, delivery condition, agreed repairs, warranty terms, and acceptance procedure. “We will take care of it” is comforting but vague.
Three common confusions to clear up
Low hours versus low wear
Hours measure time, not severity. Two thousand hours of careful loading in soft material is not equivalent to two thousand hours of hammer work, steep travel, salt exposure, or poor maintenance. Use hours as one clue among many.
Cat Certified Used versus any used Cat machine
A Cat-branded excavator sold privately or by an independent seller is not automatically Cat Certified Used. Certification, inspection coverage, eligibility, and warranty terms must be verified for the exact machine and market. Ask for written program documents rather than relying on a logo in an advertisement.
A clean machine versus a maintained machine
Cleaning helps you inspect, but shine is not service history. Fresh paint cannot prove correct oil intervals, clean fuel, proper track tension, or gentle operation. Records, measurements, analysis, and a loaded test carry more weight.
Your practical inspection-day sequence
- Before traveling: Request the serial number, meter photo, cold-start agreement, records, attachment list, known faults, location, and seller identity.
- Before starting: Match identification, photograph the machine, inspect fluids safely, examine the undercarriage and structure, and look for leaks.
- During startup: Observe warning-lamp self-tests, starting behavior, sound, exhaust, codes, and initial hydraulic response.
- When warm: Test every function, travel direction, speed, attachment, control, and safety feature.
- Under load: Dig suitable material with permission and check hot performance, drift, noise, leaks, and cooling behavior.
- After shutdown: Walk around again because fresh leaks or odors may appear only after the machine works.
- Before offering: Wait for the technician’s report, fluid results where used, ownership verification, repair quotes, and first-year cost calculation.
For an additional market benchmark, EquipmentWatch’s equipment values and market-data overview explains the types of valuation, lifecycle, and cost information available to contractors, insurers, and public agencies. It is most useful when you need a defensible comparison rather than a handful of advertised prices. Access to detailed data may require a paid service.
Final takeaway: buy the evidence, not the shine
A worthwhile used Cat excavator should fit your jobs, transport plan, attachments, budget, emissions obligations, and support options. Its identity should match its documents. Its wear should make sense beside its recorded hours. Its cold-start behavior, hot loaded performance, fluid history, diagnostic information, and first-year cost should all tell a reasonably consistent story.
Your seven essential checks are straightforward: confirm job fit and identity, measure the undercarriage, examine structures and hydraulics, demand a cold-to-hot operating test, study fluids and electronic evidence, verify safety and regulatory compatibility, and calculate the complete first-year cost.
If one clue conflicts with the others, pause. Ask why. A credible seller should be comfortable with reasonable verification, although no seller can promise that an older machine will never fail. When a major question remains unanswered, price that uncertainty honestly or leave the machine behind.
That is the real advantage of a disciplined used Cat excavator inspection: it does not merely help you find a lower price. It helps you choose a machine that can arrive at your job, perform the work you bought it for, and keep expensive surprises within a level you can actually manage.
Compare related used road rollers or browse the complete used equipment inventory from NJ Construction Machinery.